
Arduino's L293D motor driver shield guide
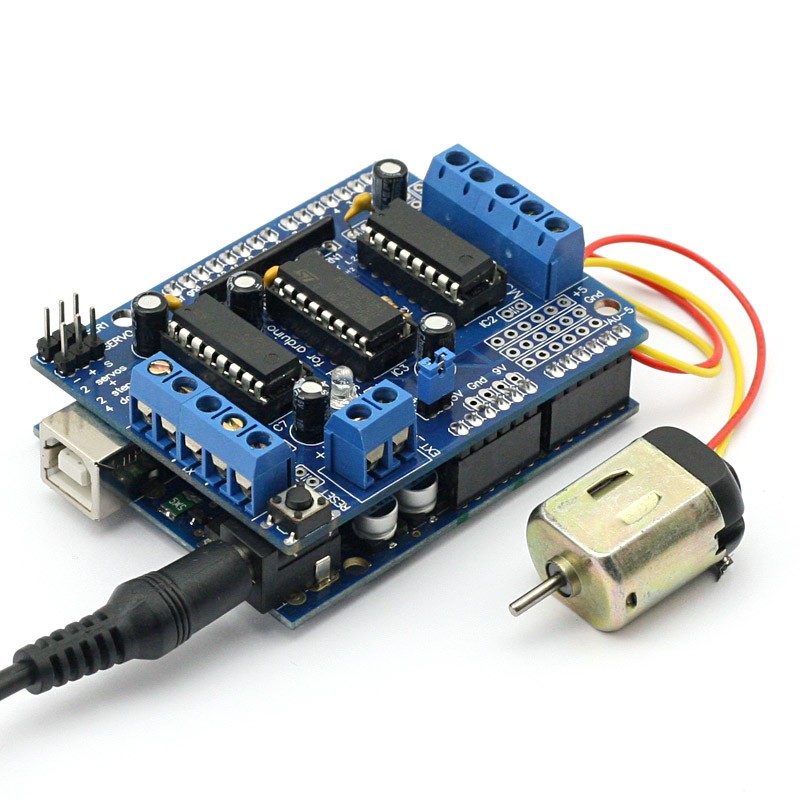
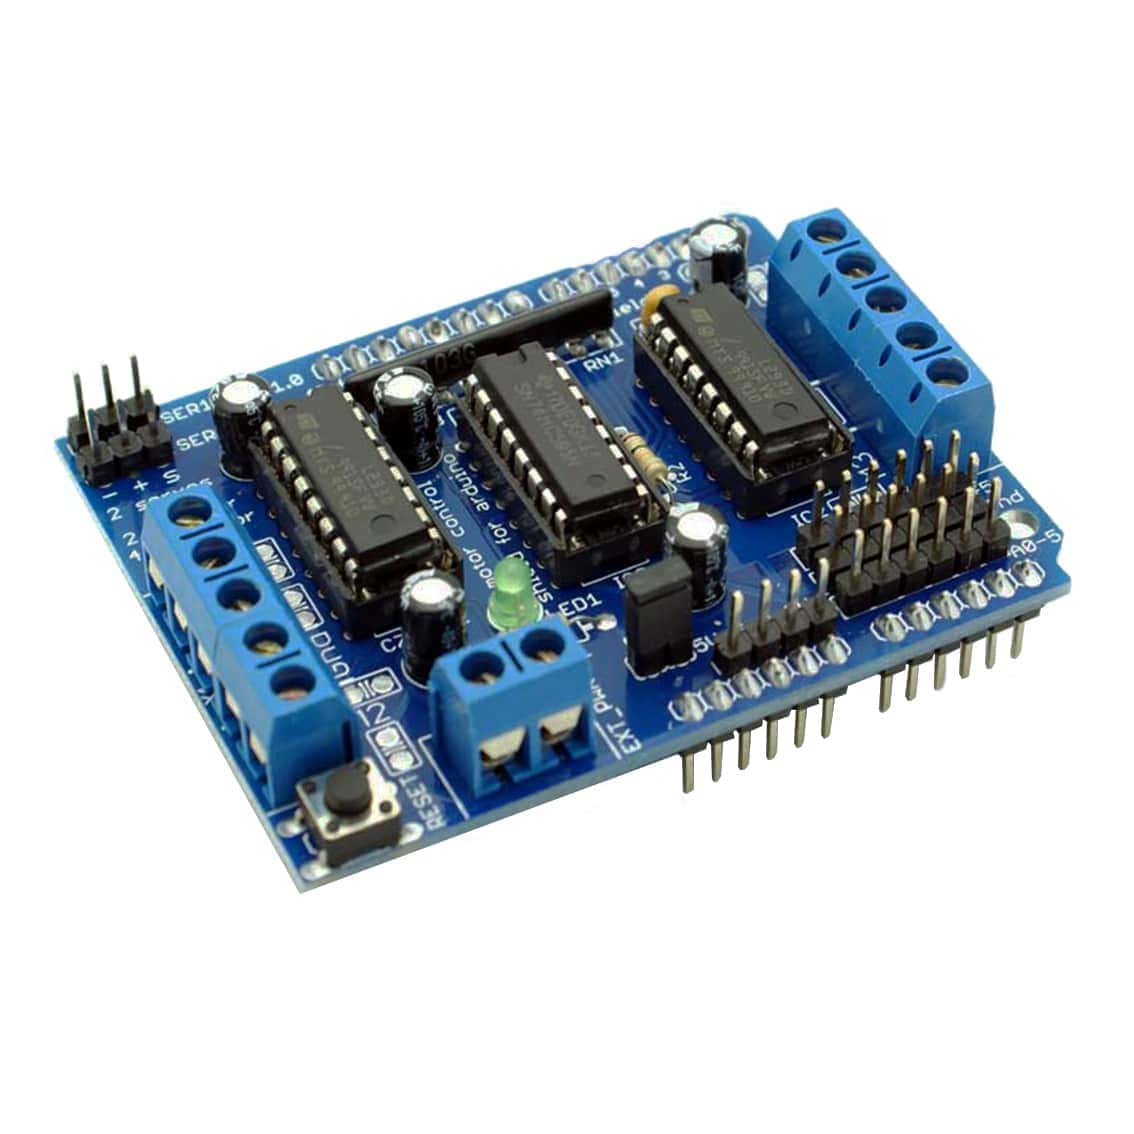
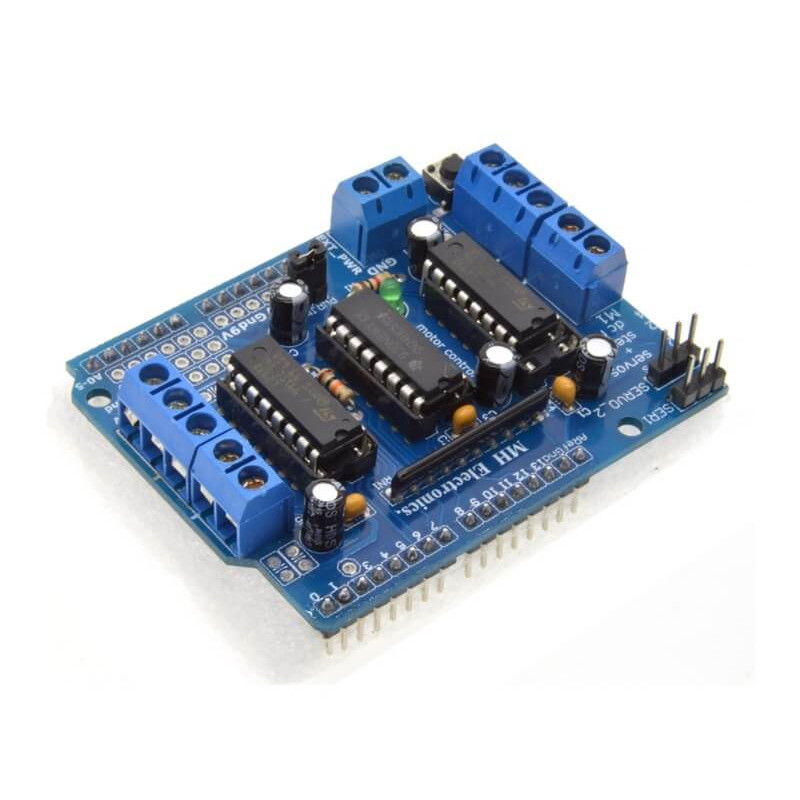
See the pictures below. This motor driver shield mainly consists of two motor driver ICs and one shift register IC. This shield uses the L293D motor driver IC and 74hc595 shift register IC. We can see two terminals on either side to connect the motors. It can connect two servo motors, four gear motors, and two stepper motors.

L293D Arduino Motor Shield ElectroDragon
The Arduino L293D motor driver shield guide is a robobtics project that involves driving various types of motors. The most common types used for robotic applications include DC, servo, and stepper motors. However, these motors typically cannot be driven directly by Arduino or another microcontroller.
How to connect bluetooth module to l293d motor shield?
Arduino getting started A robot fair and the specific and technical data of the robot. Writing Description of your own robot which you wish to join to the fair. 4.2 Think small, Dream big Lead-in activity Guess the device through the pictures. Reading and writing A superficial knowledge about how to construct a line follower robot.

Arduino en mBlock. Motor Shield L293D YouTube
Interfacing Arduino with your smartphone; Bluetooth; L293D IC;. I don't know if there's any shield that allows that… but with the Arduino itself you can't.. can'i use Module Bluetooth 2.0 for this project -Arduino - Control DC Motor via Bluetooth. Reply. Rui Santos. March 12, 2014 at 1:31 pm

SOLVED L293D motorshield with batteries don't power arduino Motors, Mechanics, Power and CNC
Today in this article we are going to Make DIY Arduino Bluetooth control car with Arduino UNO R3, L293D Motor Driver, and HC-05 Bluetooth Module. Here you will get Fully Detailed instructions for making Arduino Bluetooth Controlled Car. Codes are also Included.
Embedded Systems in Egypt Arduino Motor Shield With L293D and Bluetooth Module
Step 1: Requirements Arduino uno Motor shield Battery for motor (above 4v and above 1amp) Power bank of 5v to power the arduino HC-05 Bluetooth module Robot chassis Ask Question Step 2: Assemble the Chassis Assemble the motor, wheels and chassis.. As given instructions with chassis. Ask Question Step 3: Download the Zip File Download the zip file
Arduino Shield L293d Para Motores Dc A Pasos Y Servos 10100 En Images
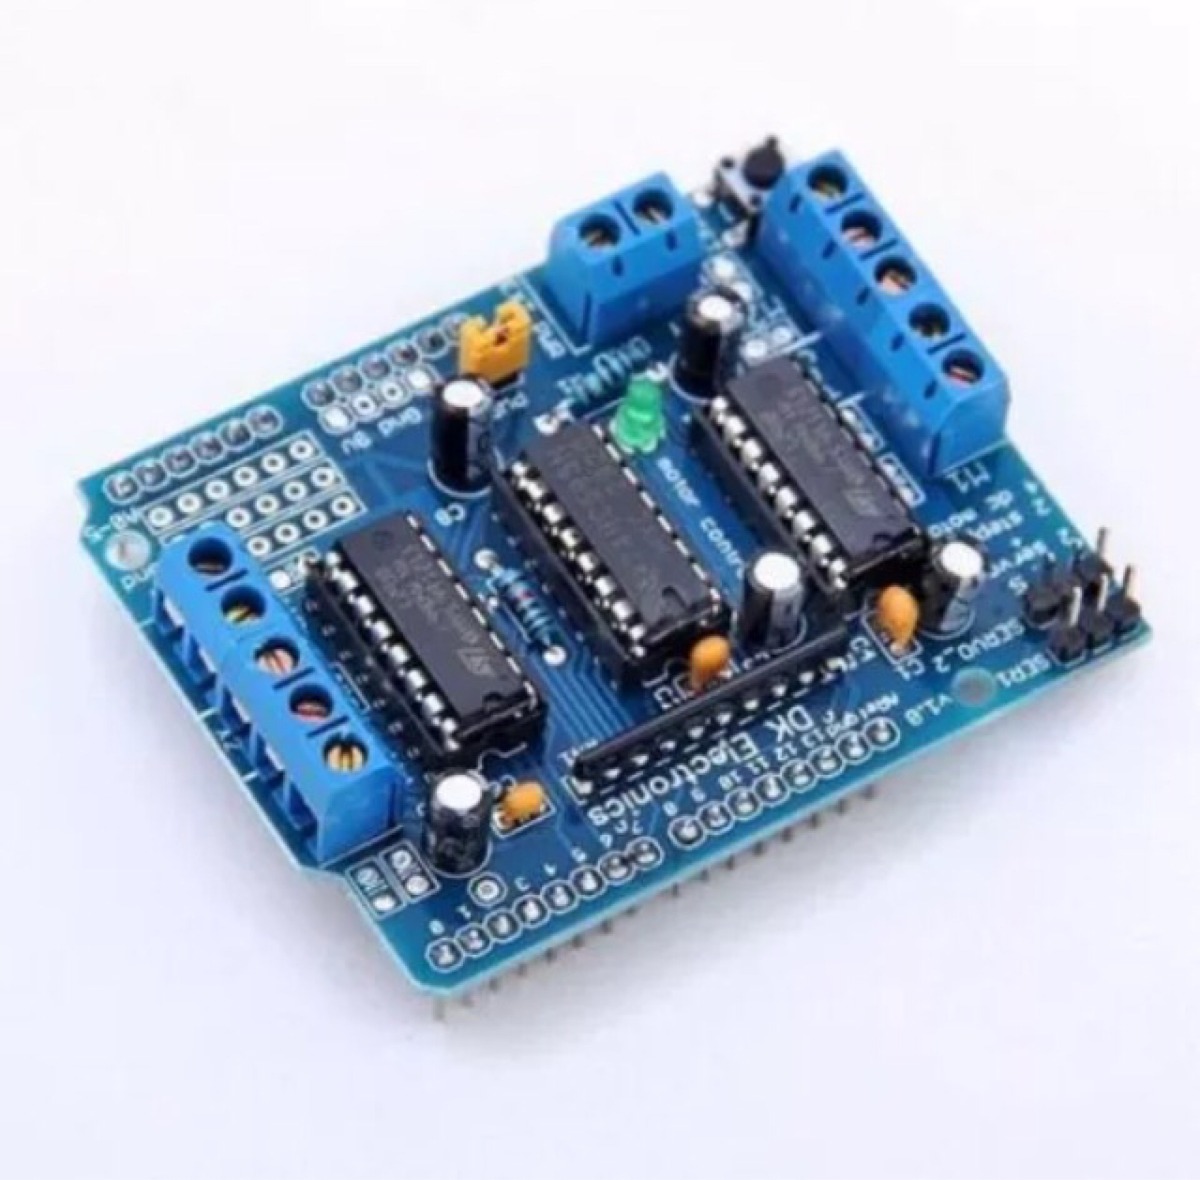
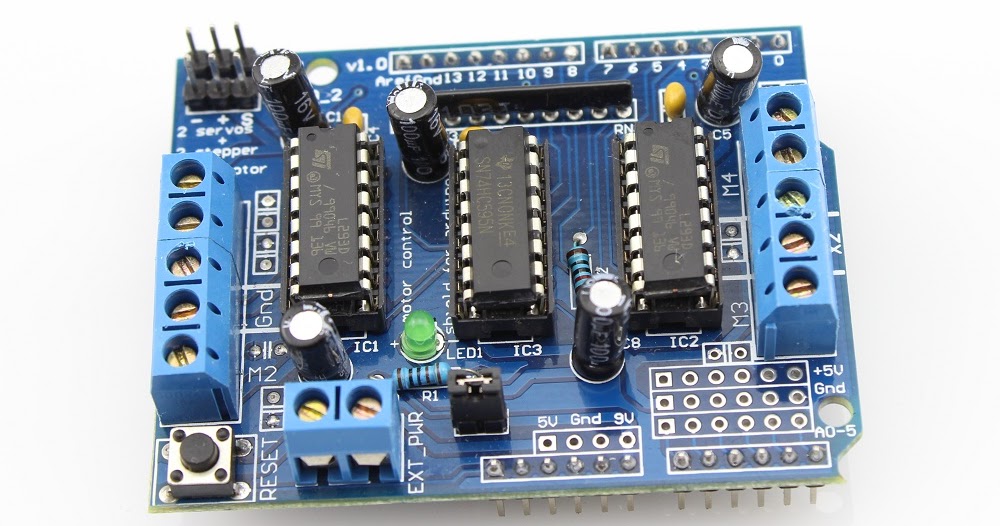
The L293D motor shield is shown below. The L 293D motor shield is a popular device used to control DC motors. It is a compact and easy-to-use shield that can control up to two DC motors. The shield is equipped with an L 293D integrated circuit, which is capable of driving motors with a voltage ranging from 4.5V to 36V and with a current of up.
Motor Control Shield L293D
Step 1: Parts Hardware: Arduino Uno Motor Shield L293D Driver Bluetooth Module Robot platform Software: Arduino IDE Bluetooth RC Controller (you can download this app here) Ask Question Step 2: Mount the Hardware The mounting of the robotic platform is very easy. If you buy one like that, you will receive a manual with all steps.
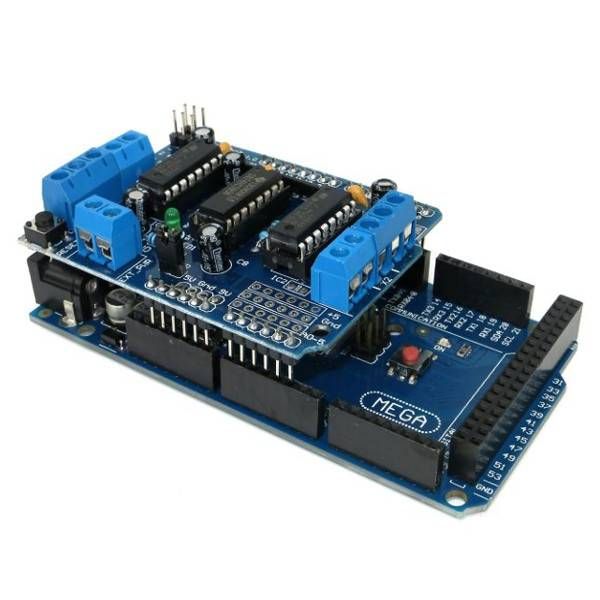
L293D Motor Drive Shield Module for Arduino Mega and UNO Phipps Electronics
Step 1: What We Need 1.Arduino UNO 2.L293D IC Or H-Bridge 3.HC-05 Bluetooth Module 4.BreadBoard 5.Chasis 6.2xDC Motors 7.9V Battery Or Power Bank 8.Jumper Wires Step 2: Getting the Chasis Ready You Can Make A Chasis Just Like Me. Or You Can Buy A Readymade One. For Making A Chasis:-1)Find A Rectangular Wooden or Plastic Plate.
Arduino L293D Motor Driver Shield Tutorial ElectroPeak
Connect the bluetooth shield to the Arduino, and connect the motor shield to the same Arduino. Ananthakrishnan October 12, 2016, 11:31am 7 PaulS: That's probably because doing that makes no sense. Connect the bluetooth shield to the Arduino, and connect the motor shield to the same Arduino.. see I have a Hc 06 Bluetooth module.
Arduino Motor Shield L293D
Step 1: Project Overview A robot car chassis contains the bottom frame, upon which the motors that drive the tires/wheels are attached. The motors are connected to a powered Motor Drive Shield that is connected (piggyback style) to the Arduino UNO board. A Bluetooth receiver module is connected to the Arduino board as well.
Arduino L293D Driver Motor Shield Blue
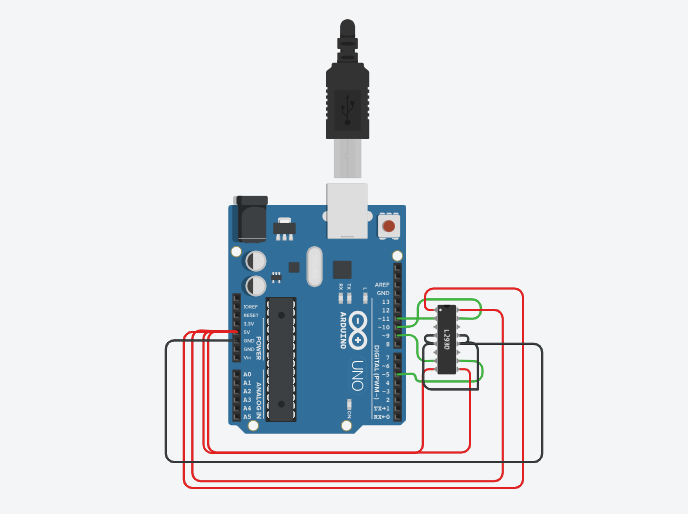
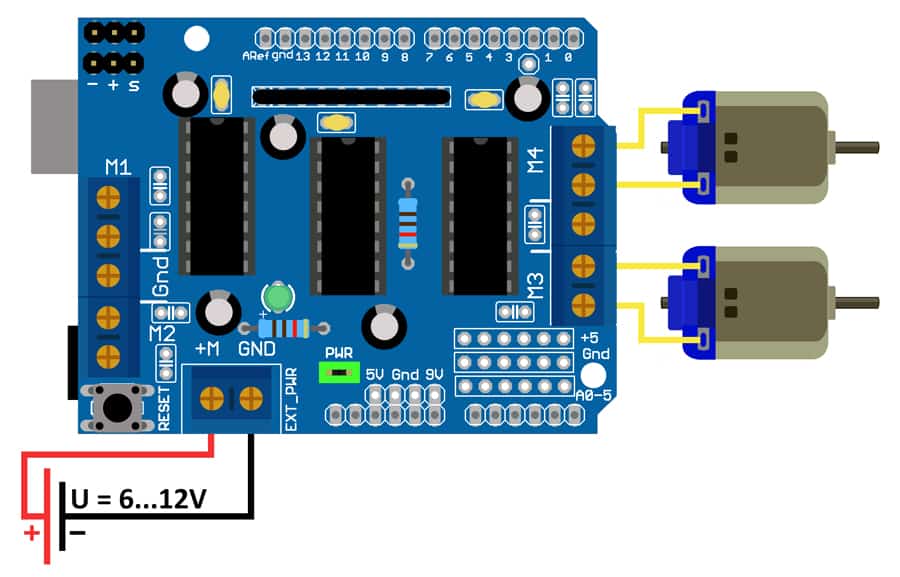
And make sure your circuit and Arduino share a common ground. Now connect the L293D IC's Input and Enable pins (ENA, IN1, IN2, IN3, IN4 and ENB) to the six Arduino digital output pins (9, 8, 7, 5, 4 and 3). Note that Arduino output pins 9 and 3 are both PWM-enabled. Finally, connect one motor to OUT1 and OUT2 and the other motor to OUT3 and OUT4.

L293D Supplier L293D motor driver shield to drive DC motors as well as servo motors
Hardware Overview Driver Chipset The brains of the shield are two L293D motor drivers and a 74HC595 shift register. The L293D is a dual-channel H-Bridge motor driver that can control two DC motors or a single stepper motor. Because the shield includes two such motor drivers, it can control up to four DC motors or two stepper motors.
L293D Motor Drive Shield for Arduino
A new tutorial! This time I chose to build an Arduino Bluetooth Controlled car. This is the easiest Arduino Robot Car and a very popular Arduino Project for beginners. I will explain every single thing in this article and have made a tutorial video on YouTube. Hope this will be a perfect article for your DIY Arduino Bluetooth Controlled Robot Car…
Jan Lipovský Blog RoboCar Arduino Motor Shield L293D with Raspberry Pi B+ (part 1)
Step 1: Basic Structure Building First of all take a dc geared motor and soldier the wires in the both terminal of the motor. Repeat the same process for the other three dc geared motors. After soldiering the wires you have to take a wooden board having a length of 7 inch and width of 5 inch. Read More >> Ask Question Step 2: Circuit Connection
control a dc motor with arduino and l293d chip Arduino dc motor control with joystick and l293d
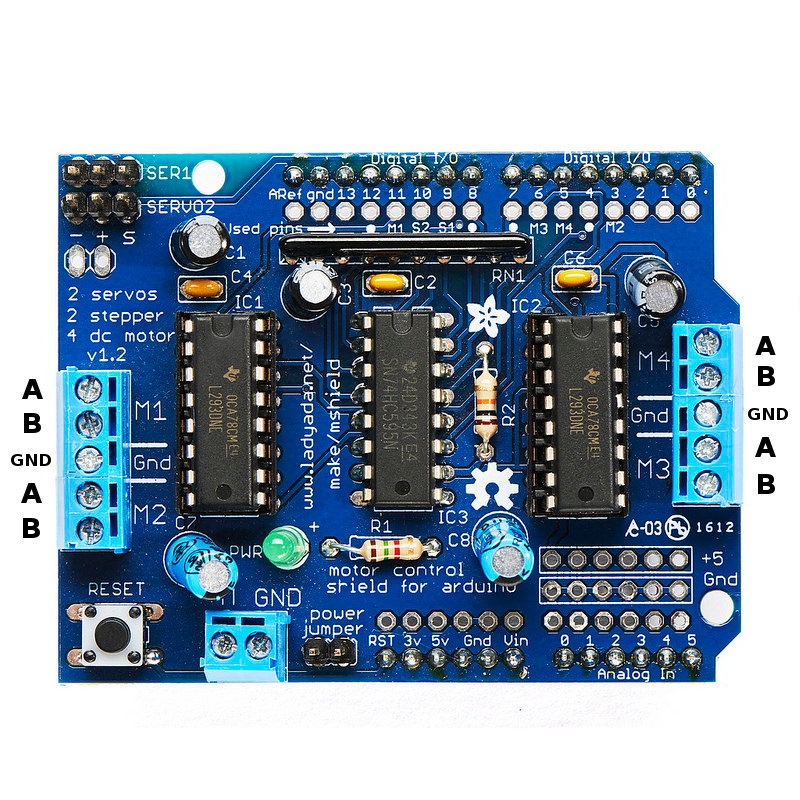
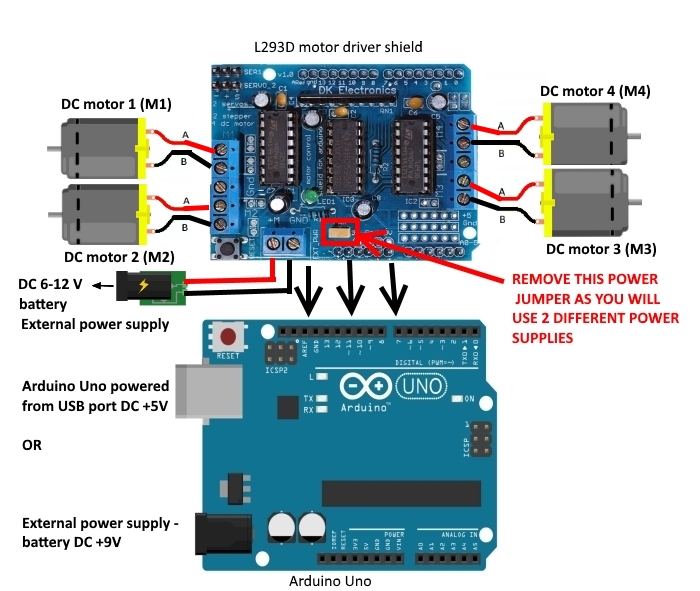
Motor Connections The figure below shows all the motor connections present in the L293D Motor Driver Shield. Two servo motors, Four DC Motors and Two stepper motor connections can be found on this motor driver shield. At the top left corner you can view two three pin headers.